Pages

Wednesday, January 27, 2010

Jan 28th - National Blueberry Pancake Day


Today is National Blueberry Pancake Day, so I wanted to share with everyone an amazing AND healthy recipe for Oatmeal Buttermilk Pancakes with Wild Blueberry Sauce.   Personally, I'm not a huge fan of pancakes, the main reason being that I don't like syrup.  It goes back to my childhood when I got sick from eating it, so it's basically a mental block, but one that I don't think I'll let go of anytime soon.  Another aspect that leaves something to be desired for me, is the consistency of pancakes.  I love waffles for the crunch factor, and I normally put peanut butter on my waffles.  It's actually quite good!  With pancakes, however, they tend to be a boring piece of fluffy flat dough.  As with any good mother, I've made my fair share of pancakes regardless. 
These pancakes changed me.  In addition to the basic ingredients, they are also made with whole wheat flour and oats.  The added bulk, especially from the oats, made for a more flavorful and dense pancake.  It also gives you a little bit more to chew on and doesn't just dissolve in the syrup like regular pancakes. Another flavorful component of these delectable flapjacks is the buttermilk.
On a side note, why does buttermilk make everything taste so good, but yet on its own, taste absolutely horrible?!  We have some leftover in the fridge and I'm continually reminding my milk-loving son that he really doesn't want to drink the buttermilk.  Meanwhile, as the pancakes are bubbling and browning, you can have the simple blueberry sauce simmering on the stove.

Frozen wild blueberries, sugar, and fresh lemon juice meld together over medium heat until the glistening berries pop.  Cinnamon is stirred in at the end to finish the sauce.  Not overly sweet, but a perfect balance. A great benefit of this recipe, according to Health Magazine, is that the vitamin C in the blueberries helps your body absorb more of the plant-based iron in the oats.  So feast up and enjoy these oatmeal pancakes with blueberry sauce on today's National Blueberry Pancake Day!


Oatmeal Pancakes with Wild Blueberry Sauce
(from Health Magazine)


For pancakes:
1 1/2 cups rolled oats
1 cup low-fat buttermilk
1 cup all-purpose flour
1/2 cup whole wheat flour
1/4 cup sugar
1 teaspoon baking soda
1 teaspoon baking powder
1/2 teaspoon salt
1/2 teaspoon ground cinnamon
2 large eggs
2 large egg whites
1 1/2 cups 1% low-fat milk


For sauce:
2 cups frozen wild blueberries, thawed
1/4 cup sugar
1 tablespoon fresh lemon juice
1/4 teaspoon ground cinnamon

Soak oats in buttermilk in a small bowl for 15 minutes.  Combine flour, whole wheat flour, sugar, baking soda and powder, salt, and cinnamon in a medium bowl.  In a separate large bowl, whisk the 2 eggs with the 2 egg whites together and then stir in the 1% milk.  Add the dry ingredients to the wet ingredients and stir.  Then add the oatmeal/buttermilk mixture and stir.  Heat a nonstick skillet over medium-high heat and coat with cooking spray.  Pour about 1/2 cup of batter per pancake onto hot skillet, and cook 2 minutes or until tops are covered with bubbles and edges look cooked.  Flip and cook 2 minutes or until bottoms are lightly browned.  Transfer to a plate; keep warm.  Cook remaining batter in batches.  Meanwhile, combine the blueberries, sugar, and lemon juice in a medium saucepan.  Cook over medium heat until berries pop.  Stir in cinnamon.  Spoon blueberry sauce over pancakes; serve.  Makes about 12 pancakes. 

Monday, January 25, 2010

Italian Appetizer Bites


I have no idea where it this recipe came from originally, although I've heard maybe from a Woman's Day magazine or something, but it's been floating around for a long time.  It is probably one of the easiest and heartiest appetizers out there.  Even though I think most people have had this before, I'm pleasantly surprised by the amount of people who end up asking me for the recipe!  So here it is - Italian Appetizer Bites. 


First you take one 8-ounce container of crescent rolls, unroll it, and place on the bottom of a 13x9 glass dish, pressing at the perforations in order to seal the seams.  I can't believe this recipe could get any easier, but it did, at least for me in San Diego.  When I went to buy the crescent rolls at my local Vons/Safeway just last week, I saw Pillsbury had a great new product - Crescent recipe Creations Seamless Dough Sheet!  Ingenious!

On top of the crescent dough, you layer salami, provolone, and ham and then pour a mixture of beaten egg and shredded Parmesan cheese over the top.  Next you add roasted red peppers and then repeat the layers again, ending with the peppers.

Cover it up with another sheet of crescent dough and brush the top with an egg.  The baking and cooling part is the longest.  You'll need to cover it with foil (but remember to spray the foil with cooking spray so the top doesn't stick!), and cook it for at least 30 minutes to ensure it is well on its way to being set.  Then remove the foil and bake another 30 minutes.  You can even put the foil back on if the crust is browning too much.  After this delicious creation comes out of the oven, there really is no way to cut it until it cools, at least for 45 minutes.  I sometimes wait a full hour.  If you don't, you'll have a fairly gooey mess on your hands, so best to let it set up.  Cut into squares and enjoy! 


Italian Appetizer Bites


Makes about 32 squares


2  8-ounce packages of crescent dough, seamless sheets if you can find them
1/2 lb salami, sliced
1/2 lb provolone cheese, sliced
1/2 lb ham, sliced (I normally use a smoked or black forest ham, not a honey or brown sugar ham)
7 eggs
1 cup grated Parmesan cheese
1  12-ounce jar roasted red peppers, drained


Heat oven to 350*.  Spray a 13x9x2 glass baking dish with cooking spray.  Unroll a package of the crescent dough and place in the bottom of the baking dish.  Press seams together if there are any.  Begin layering by covering with 1/2 of the salami, then 1/2 the provolone, then 1/2 the ham.


Lightly beat 6 eggs together with the Parmesan Cheese and pour 1/2 of the mixture over the ham.  Then top with half of the red peppers.  Layer again with the remaining salami, provolone, and ham, then the rest of the egg mixture, and the remaining peppers.


Unroll the other package of crescent dough and place on top.  Lightly beat the remaining egg and brush on top.  Spray foil with cooking spray and cover dish before placing in oven.  Cook for 30-40 minutes with foil on, then remove foil and bake for another 30 minutes or until top has browned.  Cool for about 1 hour and cut into squares.

Thursday, January 21, 2010

Honey-Rosemary Lamb Sandwich


For those of you who either know me or have read my early blog posts, you know I love lamb!  Any type and any style, from lamb ragu, to raw, steak tartar-style, or even in wontons.  This dish was something quick for a weekend lunch, but loaded with flavor.  I happened upon the recipe in Sunset magazine, Honey-Rosemary Lamb Sandwich.  Interestingly enough, the lamb recipes I've recently made, all contain ground lamb.

Up until a short time ago, it was very difficult to find ground lamb anywhere.  The stores have lamb chops, shoulder and round bone cuts, and my personal favorite, the lamb loin chop.  I enjoy broiling the thick loin chops so they are still rare and very juicy inside.  I've been very happy to see my local store start carrying ground lamb on a regular basis.  Which, in turn, meant new recipes to try!


In this recipe, you start off browning the lamb and then adding onion and garlic to the mixture.  After some tomato puree is poured in, the next ingredients are the flavor boosters - honey and fresh rosemary.  I went with what the recipe called for, 1/4 cup of honey, but I personally found it a tad on the sweet side.  The 2 teaspoons of finely chopped fresh rosemary added a wonderful aroma to this sloppy joe-like combination.

On the bun, you spread goat cheese, top that with fresh spinach, and then the lamb mixture.  Once it was all together, the sweetness was cut by the goat cheese and it was quite good.  All in all, it is a tasty lamb sandwich. 

B9CH8QYF2R4X

Tuesday, January 19, 2010

My adventure with Poutine

Not sure if you've heard, but Poutine is making it's way to the US.  I had no idea what this was until I saw the recipe in Cooking Light magazine.  I'm also not sure how this recipe can be "light" when it features french fries crisped up in duck fat, a sausage gravy, and cheese curds.  Oh, the sausage is supposed to be 50% less fat; that must be it.


Poutine is a dish that originated in Quebec, Canada in the late 1950's.  It is diner food.  It is so popular, in fact, that McDonalds, KFC, and Burger King all serve it in their restaurants in Canada!  In it's simplest form, it consists of french fries, with a brown gravy and cheese curds.  Doesn't sound very appetizing, but the recipe in Cooking Light for Poutine had me curious. 

I probably wouldn't have ventured to make this recipe if it wasn't for the fact of finding delicious cheese curds on sale at the Rogue Creamery in Central Point, Oregon.  AND, to make things even better, I saw this package of Rillettes at the creamery.  Again, with my naivety in full swing, I thought to myself...I know this is basically pate, but there seems to be this layer of fat on top.  I need that layer of fat to cook the french fries for Poutine!  So I bought it with high hopes of making an authentic Canadian fast food dish.


Once I opened the package of Rillettes, I knew I was going to be in for a battle.  The layer of fat on top was anorexic-ally thin and trying to just get the fat and not the pate was impossible.  So then I thought, what would be the harm if the potato strips were cooked in the duck fat with a little essence of pate!  I tossed the cut potato pieces in my mess of fat/pate and crisped them up in the oven.  Most of the pieces stuck to the baking sheet, but the ones that didn't (probably were the ones coated with more duck fat), crisped up BEAUTIFULLY and tasted amazing.  While those were cooking, I made the simple gravy of butter, flour, beef broth, and pork sausage (50% reduced fat, remember), to become the topping of the fries.  As soon as both components were done, I covered the fries with the gravy and sprinkled on the cheese curds and fresh parsley.  Ultimately, it turned into a comforting dish that we gobbled up quickly.  It's hard to say that I followed the recipe exactly, since I'm not sure how much the duck pate flavor played into the Poutine, but needless to say, we thoroughly enjoyed our Canadian creation!

Sunday, January 17, 2010

National Hot Buttered Rum Day - January 17th


January 17th is National Hot Buttered Rum Day!  I normally wouldn't think anything of it, but as I was looking through the wonderful handwritten recipes from my great-grandmother, I came across this vintage Rum Drink pamphlet from Gourmet Magazine.  

The magazine ceased it's publication at the end of 2009, so in tribute to the now sunseted Gourmet Magazine, I decided to celebrate National Rum Day.  This pamphlet has a wide range of rum drinks from your basic daiquiri, to some old time favorites like the rum gimlet, a rum rickey, and a banana cow.  Banana cow?  I may have to try that one, and for anyone else that wants to, here's the quick and dirty:


Cut up a ripe banana into a blender; add 2 tsp sugar, 3 oz whole milk; 1 1/2 oz white rum; crushed ice.  Blend for about 10 seconds and strain into a large cocktail glass.  


But today was all about the Hot Buttered Rum.  I didn't go out and buy anything special, but on second thought, maybe I should have.  I stuck to the recipe as stated - it said you could use gold or white rum; all I had was white.  I highly recommend to anyone making this that you use gold or spiced rum.  Once we had our first taste, it was quite clear that we needed to spice it up!  We actually added more butter, some ground cinnamon and also some additional nutmeg.  Much better, but if only we had some spiced rum.  I didn't want to leave anyone hanging on National Hot Buttered Rum Day, so I located a recipe from Gourmet, 1969, of their Hot Spiced Buttered Rum.  They call for golden rum.  Good choice, Gourmet. 


Tuesday, January 12, 2010

Dried Cherry and Almond Cookies with Vanilla Icing


I will never claim to be a baker, but I will fully admit my desire to create baked goods.  There is something so comforting about making a fresh batch of cookies.  I was excited to find Giada's recipe for Dried Cherry and Almond Cookies with Vanilla Icing since I had everything on hand.  I've been making a real effort to clean out my fridge and pantry to not let things go to waste, and this recipe fit the bill.  I didn't have enough dried cherries to quite make the 3/4 cup that it called for, but it was close.  Luckily in baking, you can cheat on those "add ins" a bit, whereas the dry and wet ingredients, you can't!

This simple recipe starts with making a dough that is close to a sugar cookie dough, but with added almond extract and cinnamon.  Then you stir in the chopped dried cherries and the toasted slivered almonds.  Toasting the nuts here is key since it brings out such a wonderful flavor in the almond.  For the next step, you plop the dough onto a piece of plastic wrap and roll it as best as you can into a 12-inch long log.  Remember, I never claimed to be a baker, so no laughing at my pictures!


How people get cookie logs to be perfectly round, I will never know.  If anyone has any great tips (besides patience, which I'm a bit limited with), please let me know!  The cookie log can be kept in the refrigerate for up to 3 days, but has to stay in for at least 2 hours.  The cookies are then sliced and baked until golden on the edges and puffy in the middle.  Finally, after they are cooled, you drizzle them with an icing, made of powdered sugar, water, and vanilla extract.  Now that's the fun part.  Just drizzle them on the same parchment paper that they were cooked on and you can make as much of a mess as you want!  I hope you enjoy this buttery sugar cookie with crunchy toasted almonds and tart cherry morsels as much as I did.

Sunday, January 10, 2010

White Wine Coq au Vin

I'm having an internal struggle with coq au vin.  Previously, I posted the Easiest, best-tasting Coq au Vin ever, made with red wine, with the thought that I would eventually try a white wine coq au vin. Due to my love of red wine, I was fairly certain that I would prefer the red wine version.  Now, I just can't decide.  I've come to the resolution that it is okay to love both!  Different from the deep mushroom flavor of the red wine coq au vin, this white wine version got it's flavor boost from a few star spices, namely Herbs de Provence and fresh tarragon.  Also, instead of the mushroom, carrot, and Canadian bacon combination, it was lightened up with celery, carrots, and onions (and a little bit of bacon).

Before going onto the recipe, I want to share with you my love of Herbs de Provence.   It is a mixture traditionally made with thyme, savory, fennel, basil, and lavender that was invented in the 1970's.  There are recipes out there to make it yourself, but I've never ventured down that path.  Even though the predominant spice in the mixture is normally thyme, it is the subtle lavender flavor that leaves me wanting more.  I love this spice medley so much that my favorite way to enjoy it is simply stirred into cottage cheese. I encourage you to try this - it is wonderful!  Speaking of wonderful, this White Wine Coq au Vin  from Sunset Magazine is just that.  It is hearty, but light at the same time.  After cooking up a few slices of bacon, the flour and Herbs de Provence dusted chicken pieces are browned in the bacon fat.  The vegetables cook again in the same pan and then all is added back, along with the white wine and chicken broth as the liquid.  Once everything has simmered together, freshly chopped parsley and tarragon are the final touch.  I took their suggestion and served it with french bread slices which I would say is a must to sop up the flavorful sauce.  If you try both versions - red and white - please let me know which you like better!


Thursday, January 7, 2010

Sausage and Egg Flatbread


This has got to be one of my all-time favorite breakfasts, both to eat and prepare.  We enjoyed it first on Christmas morning, and it will definitely be a staple around our house from here on out.  When I have my son on Christmas morning, I normally prepare something like pull-apart cinnamon rolls the night before, to pop in the oven the next morning while we open presents bright and early.  This year, since we weren't seeing Ryan until the afternoon, I had some leisure time to cook.  I don't want to imply that this dish takes a long time to make, because it is actually very quick.  I found this recipe in an issue of Cooking Light Magazine - Sausage and Egg Flatbread - and knew Mark would love it since it has "runny eggs", as I call it.  When I fry my eggs, they are broken, over-hard, almost dead.  Mark likes them over-easy, a true gooey mess.  How can I be an adventurous foodie, though, if I don't try what I'm not comfortable with?! 

You start off by unrolling a container of refrigerated french bread dough, cutting it in half crosswise, and putting it on a jelly roll pan that has a light sprinkling of cornmeal.  On the stove, I cooked up some turkey sausage with chopped onion.  The recipe just says "turkey sausage" and I decided to use hot turkey sausage instead of sweet.  After spreading the sausage and onion mixture on the dough, you top with grated fontina cheese, of which I had none, so I substituted smoked Gouda.  I liked the smokey flavor, but next time will try it with the fontina cheese since it would allow the other flavors to come through more.  It then gets cooked in the oven for about 10 minutes, after which you bring it out for the tough part.

Carefully break 6 eggs, 3 on each strip of bread, and space them as evenly apart as you can.  This is where using a jelly roll pan comes in helpful.  I ended up breaking 2 of the yolks since as they started sliding around, I tried to correct the problem, only to expose their sunny goodness.  Oh well, those 2 could be for me!  The pan goes back into the oven until the eggs are set, so I thought if I put the pan in quickly, maybe it would cook instantly and stop running.  That wasn't completely the case, as you can see in the picture.

I didn't get any pictures before the eggs were set since I was acting quickly in the hopes of correcting my mistake.  The good news is that after you cut them in 6 equal portions, they get topped with a wonderful salad of peppery arugula tossed with olive oil and fresh lemon juice.  I really think it is the arugula salad that makes the dish.  It adds such as bright flavor to the more rich sausage, egg, and cheese taste.  It was refreshing, not heavy, and beautiful.  The arugula also covers any mistakes!  How great is that!?!

Tuesday, January 5, 2010

Crab Feed!

 
Happy New Year to all!  We've just returned from a wonderfully relaxing time up at Mark's parent's house in Newport, Oregon.  Some of you may have seen the delectable chicken hearts that we ate last week, but somehow I think this post will have you craving the content a bit more.  This was my very first experience participating in a crab feed from start to finish!  The crab fishing in Newport is one of the best and especially for Dungeness crab.  
It felt like a covert operation.  We were on a mission to get the freshest crab possible, right off the boat.  Mark's sister, Lauri, had a phone number, a first name, and very brief instructions - "Pier 7 between 2-3pm.  Ask for Carrie".  So off we went, cooler in tow, to seal the deal.  The boat had just pulled into port and they were unloading their massive catch.  Massive in a couple of ways - the shear amount of crab they had and the enormous size of these Dungeness crab!  As cruel as it may sound, it was fascinating to watch the vat full of crabs as they clumsily tried to climb over each other in the hopes of getting back to sea.  
 
Unfortunately, their fate was sealed and we happily placed them into our cooler where they could spread their claws just a little bit more.  We took our seven back to the truck and after Ryan opened and closed the cooler about 5 more times to check on our catch, we were off to have them cooked.  
 
I'll admit my naivety here.  I imagined us going to a grocery store, walking up to the meat and seafood department with our cooler, and them taking it away in the back to be cooked.  I'm so pleased I was wrong since what we did encounter was so much more exciting!  An outdoor crab cooker right outside a market.  Seems that others had the same idea of having their crab cooked versus cooking them at home, since there was a 40 minute wait to get our magnificent seven put in the cooker.  Conveniently, the Rogue Brewery, (which will be discussed more in an upcoming post), was close by to quench our thirst from our big adventure.  


When we returned, our crabs were already in the cooker nearly done, so unfortunately, we didn't get to hear the crab screams as they were tossed into the steaming vat.  At least that's what Ryan thinks :)  When they are done, they are taken out of the cooker and placed into a cooling container, also filled with water.  This lady in the picture actually did take that 1 crab out with her bare hand, but also mentioned that he happened to have his claw out of the water, so she can't do that amazing feat all the time.  The next part was our job!  
 
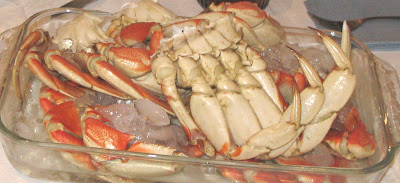
After 5 minutes in the cooling container, we were to take the crabs out ourselves and plop them in our cooler.  This was definitely going to be a job for Ryan.  They were a bit on the heavy side though, so I pitched in - also didn't want to accidentally rip off any of those precious crab legs!  1, 2, 3, 4, 5, 6, 7...I think I counted them about 5 times to ensure we had all 7 of our crabs since you couldn't see the bottom of the cooling vat.  Didn't want to forget any!
 
Back at home, the cleaning process began.  I know I said I participated in this process from start to finish, but I must admit, I was simply the photographer in this next portion. 


Their honestly wasn't enough room for three people to clean the crabs and Ryan (with a fresh new haircut, courtesy of Lauri) was determined to help Grandma Schulz remove the innards, with his glove on, of course.  Shortly after they chilled, they were served up on ice, with a table full of wine, beer, cocktail sauce, drawn butter, and garlic bread.  It was a feast and one that lasted awhile.  You definitely appreciate the crab much more when you have to work for it! 


I might venture to say that Mark is a little bit obsessive-compulsive when it comes to getting the meat out of the crab.  That, or he just really LOVES crab and doesn't want to loose any morsel.  He is very patient though, and waits until he has finished the entire process before taking his first bite.  After some explaining to Ryan on the intricacies of getting all that you can out of the crab crevices, he was finally able to enjoy his meal along with the rest of us, even though he may have been the last person sitting at the table. 


The best part of the meal was the enjoyment of family and laughing at the different ways we got to that tender crab meat.  I can't thank Lauri enough for inviting Ryan and I along on the crab adventure, since it opened up our eyes and made us appreciate it even more! 

Lastly, I want to leave you with another special family memory from the Schulz home.  I love quilts and although I doubt I will personally ever make one, I appreciate them immensely and the history that they hold.  Ryan used such a quilt during our stay, and this one was rich with history.  Mark's grandmother made this quilt out of old suits that his grandfather wore.  When the suits had reached their time, she cut them up into swatches and created this beautifully rich quilt with several different patterns and textures.  The back lining of quilt is also made out of suit material, which makes it heavy and comforting.  Mark has fond memories of this quilt growing up and it made him smile to see it again.  For our whole family, this trip created fun new memories and allowed us to reminisce on old ones.